Accounting
Batches
- Fixed issue where payments entered on work orders without a primary technician where not appearing on the Batches panel under Non-Batched Payments to add to a batch and transfer to QuickBooks
Dashboard
Tech Dashboard
- Fixed issue where dashboard was not including zero-dollar work orders in job counts
- Fixed issue where dashboard export was not including zero-dollar work orders
Owner Dashboard
- Fixed issue where dashboard was not including zero-dollar work orders in job counts
- Fixed issue where dashboard export was not including zero-dollar work orders
Dispatch
Dispatch
- Following changes were made to the Follow-Up and Unscheduled dispatch views:
- Job Date column will no longer show the time slot selected on a work order if the job date is in the past

Dispatch
- Job Date column will no longer show the time slot selected on a work order if the job date is in the past
- Follow-Up view will now display Status: ‘Promised’ in addition to ‘Ready to Schedule’ and ‘Scheduled’
- Below is an explanation of each Status option:
- Promised: Indicates a work order that was run through the Bucket Scheduler and a date and timeslot was initially promised to the customer
- Scheduled: Indicates a work order that was run through the Simple Scheduler and a date, specific time and a primary technician was assigned on the work order
- Ready to Schedule: Indicates a work order that was never run through the Bucket Scheduler or Simple Scheduler
- Below is an explanation of each Status option:
Routing
- Fixed issue where the router was sometimes scheduling jobs in the early AM hours if you had two jobs at the same address that could not be routed
Customers
Contacts
- We have implemented the initial design for the Customer Contacts panel
- This screen is still in early design stages and not all functions may be fully implemented at this time. However, we wanted to provide migrated Zware users with the capability to view contact information for customers, which was not previously available.
Overview
- The Contacts panel is used to display information about individuals who can provide you with assistance for a company/customer.
Navigate to Customer Contacts
- Contacts can only be added through the Customer panel.
- From a customer record, navigate to Options | Contacts

Customer Options - Contacts
- From a customer record, navigate to Options | Contacts
Customer Contacts - Grid
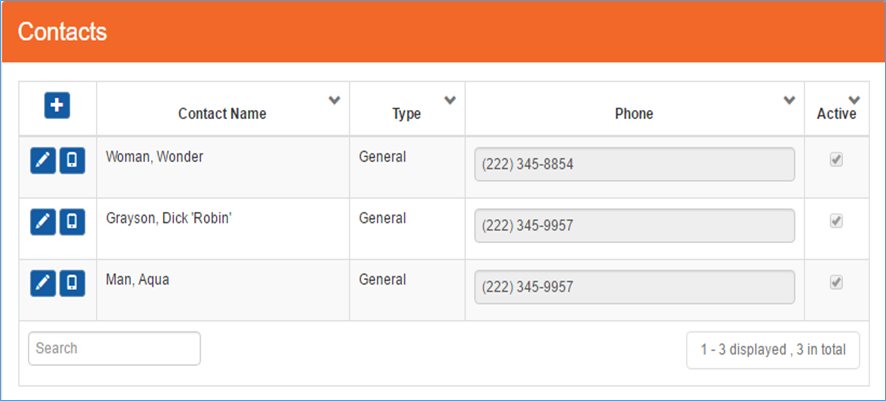
- From the customer contacts panel you can see a list of all contacts that have been associated with a customer, or add a new contact if needed.
Customer Contacts - grid
- Below is an explanation of the fields available from the Contacts panel:
Item
Functionality

Opens a new contact panel allow you to create a new contact

Opens the contact panel for the select contact allowing you to view the contact name and address and make changes if needed

Opens the contact panel for the selected contact allow you to view communication information and make changes if needed
Contact Name
Displays the first and last name that was entered for the contact
Type
Displays the contact type associated with the contact. (e.g. Bill Contact, Business Owner/Manager, Facility Access Contact or General)
Phone
Displays primary phone number associated with contact
Active
Indicates if the contact record is active/inactive on the customer record
 (checkbox selected): Represents an active contact for the customer
 (checkbox unselected): Represents an inactive contact for the customer.
Customer Search
- Contacts are searchable by name, address, or phone number from the Customer Search panel in SmartWare
- Search results will display the contacts name first with the main customer name appearing in parentheses

Customer Search
- Search results will display the contacts name first with the main customer name appearing in parentheses
Work Order Search
- From the Work Order Search, typing in a contact’s name in the ‘Name’ field will return the customer for you to select to search based off of.

Work Order Search
New Work Order – Contacts
- The Customer search on the New Work Order panel will allow searches based off customer contact information.

New Work Order – Customer Search
- When a customer contact is selected to create a new work order, the primary customer information will be displayed on the new work order and not the contact information.

New Work Order & Customer Search
General
Phone Monitor
- Change made to the Phone Monitor color and icon to help users better recognize when the phone monitor is connected vs disconnected.

Phone Monitor - Connector - Below is an explanation of each colored icon:
 (green box with phone): Phone Monitor is connected
 (grey box with arrow): Phone Monitor is disconnected
 (red box with arrow): Phone Monitor is disconnected and there appears to be no internet connection present
Work Order
Adjustments
- Added Credit Date field to Adjustments panel when creating or editing a credit memo.
- Credit Date will default to the current date. Users may change the credit date to a different date if needed.
Combined Work Order
- Editing or adding a purchase order will now display purchase order information in the Combined Work Order panel instead of launching a new work order purchase order tab.
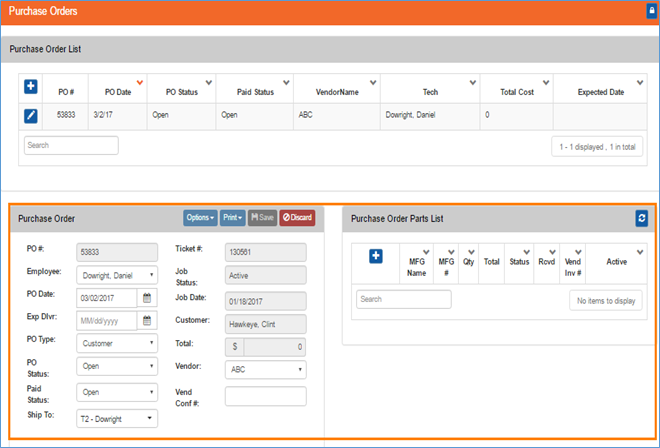
Combined Work Order – Purchase Order
Time Clock
- Fixed issue where last time clock entry for the day with a status of ‘clocked out’ was accumulating time
Setup Franchise
Options - Disclaimers
- Fixed issue where editing a disclaimer record with no attachment was not allowing you to associate a new document with the disclaimer record.
Options - Phone Lead Source
- Added Phone Lead Source panel to Setup Franchise. Phone Lead Source will allow you to associate a campaign phone number with a lead source and/or secondary lead source
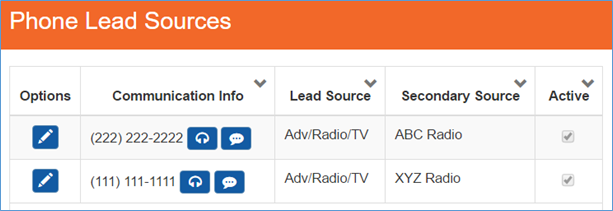
Phone Lead Sources
- In order to associate phone numbers to a lead source you must have phone numbers setup under Setup Franchise | Options | Communication with a communication type of ‘Campaign’.
- Once a campaign phone number has been created the campaign phone number will appear on the Phone Lead Source panel (Setup Franchise | Options | Phone Lead Source)
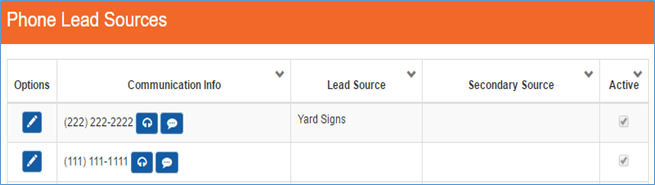
Phone Lead Sources
- Click the (edit) button located to the left phone number you would like to associate with a Lead Source and Secondary Source.
- The Phone Lead Sources (edit) panel will load allowing you to add a Lead Source (required) and Secondary Source (optional).
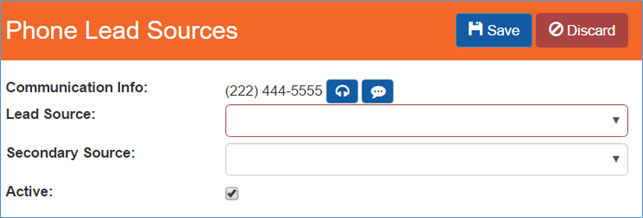
Phone Lead Sources (edit)
- From the Phone Lead Sources (edit) screen you will need to perform the following steps:
- From Lead Source drop down select the lead source you would like to associate with the campaign phone number
- From Secondary Source drop down select the secondary source you would like to also associate with the campaign number. Secondary Source is an optional field.
- If the secondary source option you are looking for does not appear in the Secondary Source drop down box, verify you have the correct Lead Source selected.
- Next, navigate to Setup Franchise | Options | Secondary Lead Sources and verify the secondary source was added for your office and associated with the appropriate Lead Source name.