Accounting
Batches
- Changed batch numbers to be unique per franchise instead of unique across all franchises
QuickBooks Setup
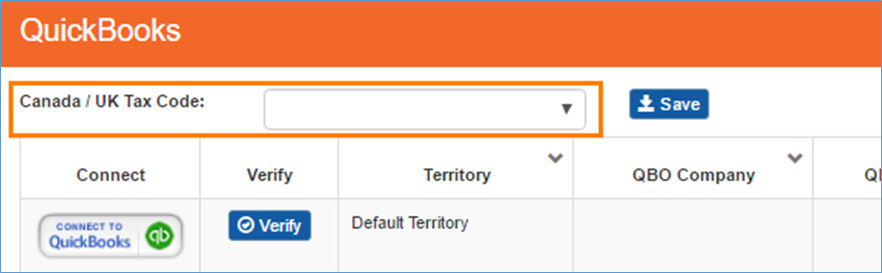
- Canada/UK Offices Only: Added ‘Canada/UK Tax Code’ field to QuickBooks Setup panel. The ‘Canada/UK Tax Code’ field is used to specify which QuickBooks Tax Code should be defaulted on invoices received from SmartWare.
QuickBooks Setup
- From the ‘Canada/UK Tax Code’ dropdown box, select the QBO Tax code you would like applied to invoices sent to QuickBooks.
- Since SmartWare sends over tax information as its own line item on an invoice, a QBO Tax Code with 0% rates should be selected.
- Most Canada/UK offices should have a ‘Z’ tax code in their QBO account which should be selected in the ‘Canada/UK Tax Code’ drop down box.
- Once you have selected the appropriate Tax Code, click the
 (Save) button to save your changes.
QuickBooks Transfer
- Fixed issue where if two franchises were simultaneously posting to QuickBooks, it was possible for the second franchise to receive the wrong credentials
- QuickBooks Transfer will now handle payment type: ‘Cheque’ for Canada offices
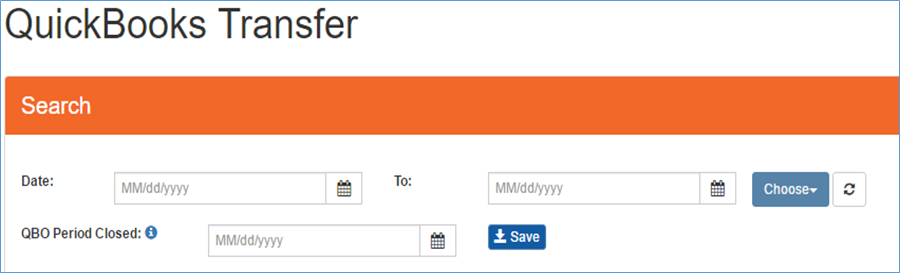
- Added QBO Period Closed option to QuickBooks Transfer panel. QBO Period Closed date field will allow you to specify the date that was set in QuickBooks for the QuickBooks Closed Date (date you have locked your QuickBooks file for)
QuickBooks Transfer
- If a QBO Period Closed date is set on the QuickBooks Transfer panel and a transaction exist BEFORE the period closing date, then the item will be posted to QuickBooks as of the closing date plus one day
- Change made to the QuickBooks Transfer to help address timeout issues when transferring large quantities of data to QuickBooks at a time.
- QuickBooks Transfer will now only process 20 records at a time. If more than 20 records exist to transfer, then the transfer will wait 10 seconds before sending the next batch of 20 items. At any time during the 10 second pause, you may click the ‘Stop Transfer’ button.
- Added Processed grid to bottom of QuickBooks Transfer panel. The Processed grid will display a list of records that were processed (sent to QB’s) and if any errors occurred during the process. Once the process is completed, or you click the ‘Stop Transfer’ button, you will be able to review the records that were transferred from SmartWare to QuickBooks
Administrative
Employees: Job Skills
- From Administrative > Employees: You will notice that all job skills a technician can perform are now listed.
- Example: If technician Clark can perform Job Skill: Standard and Full Line, then adding Full Line will automatically add a Standard job skill. You should leave it this way. If Job Skill: Standard were deleted, Clark would not be assigned Standard jobs
Menu Pricing Guide
- Added capability to view/edit category and sub-category values
- From the Menu Pricing Guide panel, you will now see an
 (Options) button which will allow you the capability to view/edit MPG categories and sub-categories
- From the Menu Pricing Guide panel, you will now see an
- View/Edit Categories:
- From the Menu Pricing Guide panel, select (Options) and then select Categories
- The Category Settings panel will load allowing you to view and edit MPG Category information.
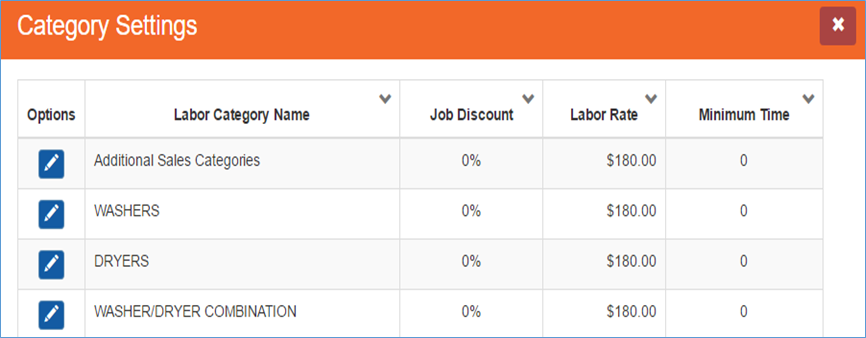
Category Settings - Click the
 (edit) button next to a category line item you would like to view or edit
 - The category will load on the right side of the screen allowing you to make changes
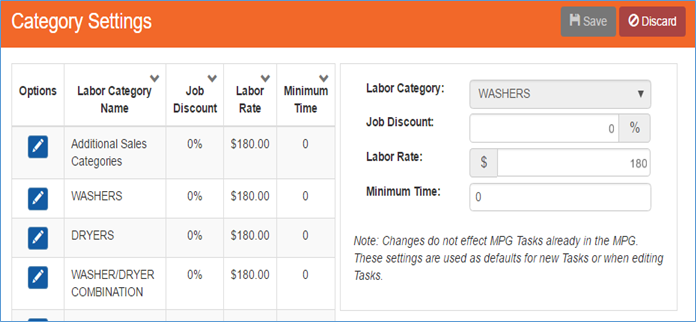
Category Settings – Category edit - You may only edit the Job Discount, Labor Rate, and Minimum Time for a MPG Category
Option
Functionality
Labor Category
(view only) Displays the Labor Category you are viewing and editing information for
Job Discount
(editable) Represents the add-on discount. This is the discount applied off the primary
Labor Rate
(editable) Represents the menu pricing factor (labor rate)
Minimum Time
(editable) Default minimum time for task in this category
· Users will have the option to override the default minimum time on the Labor Value panel when adding/editing a task to the Menu Pricing Guide
- Once you have finished making all changes, click the (Save) button
- Note: Changes do not effect MPG Tasks already in the MPG. These settings are used as defaults for new Tasks or when editing Tasks.
- From the Menu Pricing Guide panel, select
- View/Edit Sub-Categories:
- From the Menu Pricing Guide panel, select (Options) and then select Sub-Categories
- The Sub-Category panel will load allowing you to view/edit sub-category information or create a brand new sub-category

Sub-Categories
- From the Menu Pricing Guide panel, select
View/Edit Sub-Category:
- Click the (edit) button next to a sub-category item you would like to view or edit
- The sub-category (edit) panel will load on the right side of the screen allowing you to make changes
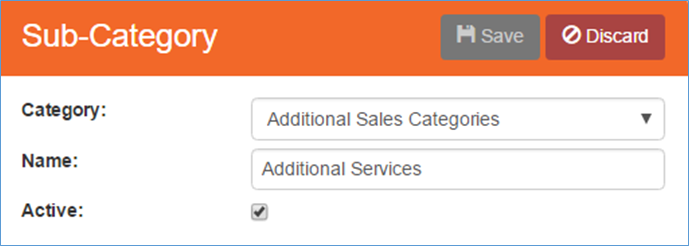
Sub-Category edit
- Below is an explanation of the available fields on the sub-category edit screen:
Option
Functionality
Category
(editable) Displays a drop-down list of all categories allowing you to select which category should be associated with the sub-category
Name
(editable) Represents the name you would like associated with the sub-category
Active
(editable) Indicates if the sub-category record is active/inactive
· (checked): Indicates that the sub-category record is active
· (unchecked): Indicates that the sub-category record is inactive
- Once you have finished making all changes, click the (Save) button
Add Sub-Category:
- From the Sub-Categories panel, click the
 (add) button
 - The sub-category (add) panel will load on the right side of the screen allowing you to create a new sub-category
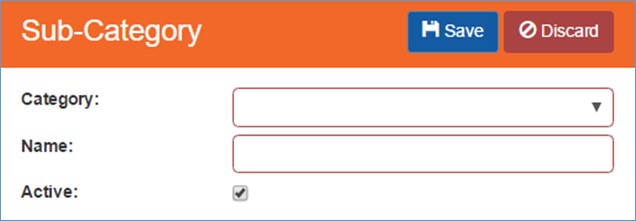
Sub-Category new
- Below are the steps you will need to perform to create a new sub-category:
- Category: From the ‘Category’ drop-down box select the category you would like to associate with the new sub-category
- Name: In the name field, type in a name to identify the Sub-Category by
- Active: Verify the active checkbox is selected
- Once you have verified all information is entered correctly, click the (Save) button to save your new sub-category
Communication
Phone Monitor
- Fixed issue where if you were entering in a new comment and a new phone monitor call was received you would lose the comments you were entering
- Fixed issue where new order created from Phone Monitor was not setting the default ‘Completed’ reason to ‘New Order’
- Moved
 (Save) button into its own column to make it more obvious that the save button would save changes made to either the Completed or Comments column
 - Added ‘view all extensions (non-real-time)’ checkbox option. If checked, will allow a user to view all calls for the day and not just calls for their phone extension
- Feature is only available for users with Role: Owner or Manager

Phone Monitor
- Feature is only available for users with Role: Owner or Manager
- Added Phone Extension column to grid if you have ‘View all extensions’ selected
- Removed following columns from Related Information Grid: ‘Job Description’, ‘Tech Comments’ , ‘Tech Recommendations’ and ‘Total Cost’
- Added
 (Show Notes) button to Related Information grid. Show notes will display all notes associated with the phone monitor item
 - Rearranged Related Information columns to be the following order: Ticket #, Technician, Status, Job Date, Address, Total Due and Balance
Dispatch
Daily History
Fixed issue where Daily History was not always display work orders that had a schedule date matching the date selected on the Daily History panel
Dispatch
- Additional changes made to help improve performance and speed when leaving and returning to the Dispatch panel
- Navigating away from the Dispatch panel will now clear internal memory used to help address performance issues
- Changes made to help insure the show info window on the map panel is always properly being displayed
- Dispatch changed to automatically refresh every 4 minutes
- Change made to automatically refresh the dispatch information when the computer resumes from sleep mode and the browser was not closed
Routing
- Change made so the Routing panel now verifies a technician has an exact match on job skill before assigning a work order to the technician
- Prior to this change if a technician had Job Skill: Sealed Systems, the router would also assume the technician could handle Job Skill ‘Standard’ and ‘Full Line’ and would assign work orders accordingly
Routing Setup
- Fixed issue where Availability screen was taking into consideration a technician’s availability across other Zones
- Fixed issue where Availability – Work Order List was excluding any work orders that had a Job Status of ‘Tech Completed’, ‘Reviewed’, ‘WSA Ready’ and ‘WSA Completed. This issue would have only been noticed when look at the Availability Work Order List for a past date.
General
Error Logging
- Logging capability added to assist in troubleshooting browser performance issues or browser crashes
- Added capability to enable browser event logging on an individual employee basis.
- Enabling browser event logging should only be done at the discretion of SmartWare Support to help troubleshoot reported performance issues
- To enable browser event logging for an individual employee you will need to perform the following steps:
- Navigate to Administrative | Employees and click (edit) button next to the employee you would like to enable browser event logging for
- From the Employee record, select Options | Options
- The Employee – Employee Options panel will load
- Click the (edit) button next to BrowserEventLogEnabled
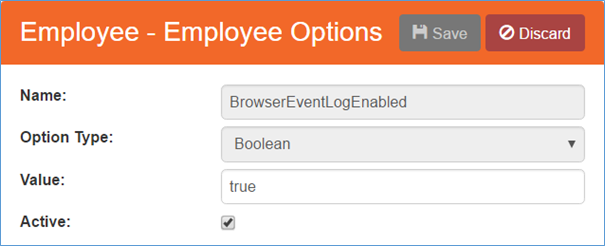
Employee Options – BrowserEventLogEnabled
- Navigate to Administrative | Employees and click
- From the Employee – Employee Options (edit) panel enter true in the Value field to enable logging
- After editing the Value field, click the (Save) button to save your changes
- Browser event logging should now be enabled and will begin logging all navigation and networking events for the selected employee
Postal Code
- Changed labels throughout software to reference postal code instead of zip code
Reports
Customer With Lead Sources
- Added new Customer With Lead Sources report which will display a list of all customers created within the selected date range along with the customer lead source & secondary lead source that was selected for the customer
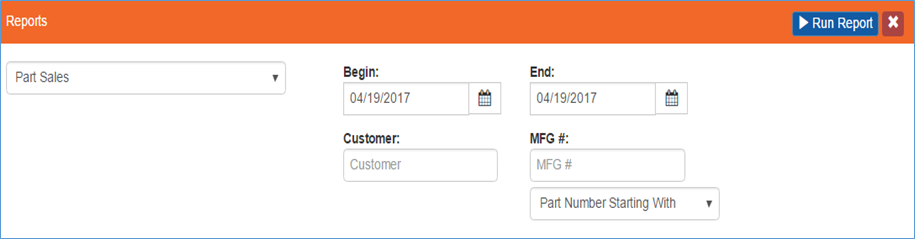
Part Sales
- Added new Part Sales report which will display a list of all parts marked ‘used’ on an active task where the work order status was marked ‘Tech Completed’ within the selected report date range.
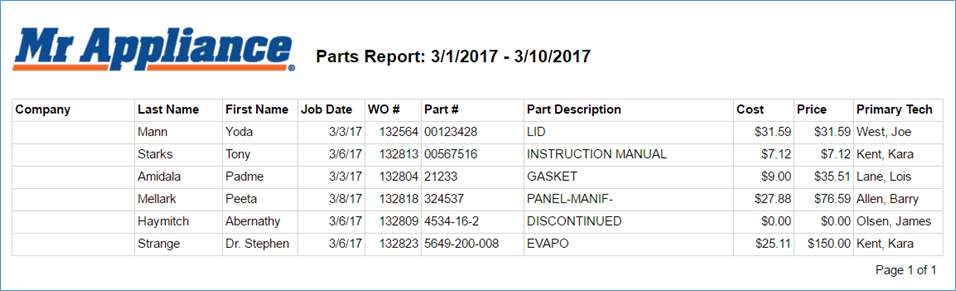
Reports – Part Sales
- Below is an explanation of the different search criteria for the Part Sales report:
Reports – Part Sales (criteria)
Criteria
Functionality
Begin:
Used in determining date range report will run for: Represents date report should start from
End:
Used in determining date range report will run for: Represents date report should end on
Customer
(optional) If used, will return only work orders where the criteria customer is either the customer listed on the work order or third party bill customer selected for the work order
MFG #:
(optional) If used, will return only work orders where the selected part was marked as ‘used’ for an ‘accepted’ Task
Zones and Postal Codes
- Removed Zones and Postal Codes report since now you can access the Zone Export from Setup Franchise | Options | Zones
Work Order
Bucket Scheduler
- Fixed First Call count to never display a count greater than the AM availability
- Fixed Last Call count to never display a count greater than the PM availability
- Bucket Scheduler will now take into consideration Job Skill listed on the work order when displaying availability counts
Receipt
- Fixed issue where work order receipts were not displaying the part cost if ‘IsShowPartCost’ was set to true in Setup Franchise under Options
Summary
- Fixed issue where WO Summary panel was not displaying the correct date/time in the Date column for Status: QBO Completed
Task and Parts
- For warranty work orders: A change was made to have the warranty part total on a task reflect the markup of the part (Part Price – Part Cost).
- Calculation: Warranty Part Total = (Part Price – Part Cost)
- Fixed issue where checking/unchecking the ‘Is Taxable’ flag on a task was not always appropriately flowing down through to parts associated with the task
Setup Franchise | Options
SmartWare Billing Summary
- Added SmartWare Billing Summary option which will display a list of technicians with a current active device associated with their employee record
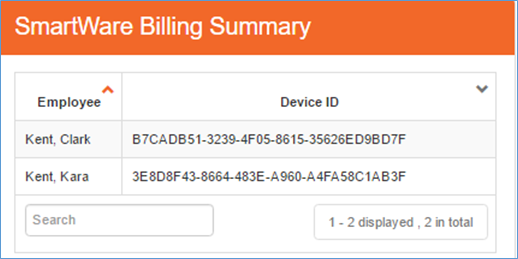
Setup Franchise – SmartWare Billing Summary
Tax Authorities
- Canada Offices: Fixed issue where Canada offices were only able to select ‘Sales Tax Payable’ from the Accounting Account drop down box when setting up a new tax authority. Canada offices will now be able to select either an appropriate QBO Accounting Code to associate with the tax authority in SmartWare (GST Sales Tax Payable, HST Sales Tax Payable, or PST Sales Tax payable).
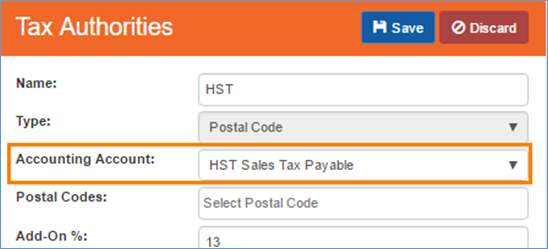
Setup Franchise – Tax Authorities
Zones
- Changed Postal Codes field on Zones (edit) panel to handle Canadian postal codes. Postal Codes field will handle both 3-character FSA and 6-character assignment to zone.
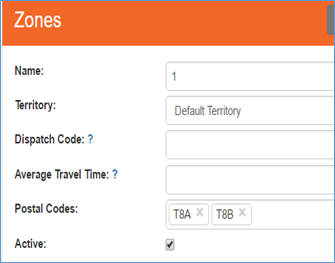
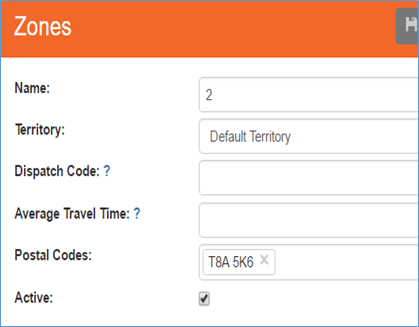
Zone Edit (3-character FSA) Zone Edit (6-character code) - Added Export and Import buttons to Zones panel
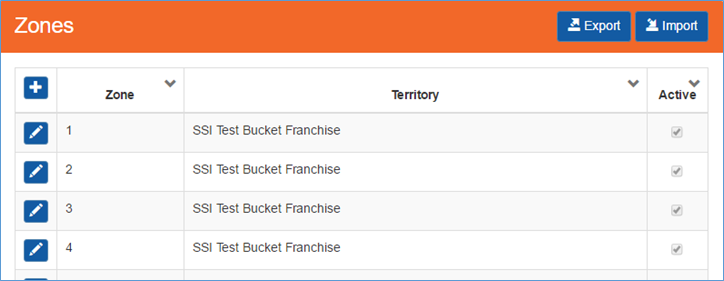
Setup Franchise - Zones
- Below is a brief explanation of each option
Button
Functionality

Will export a list of all zones and postal codes to a .csv file which can be opened in a spreadsheet viewer program (i.e. excel)

Will allow you to import a spreadsheet with a list of zip/postal codes and zone association
- Spreadsheet must match the Export file format and must be saved as a *.csv file
- See additional instructions below for Import
Import Zones
- From Setup Franchise | Options | Zones panel click the (Import) button
- An ‘Import Zones/Postal Codes popup screen will appear
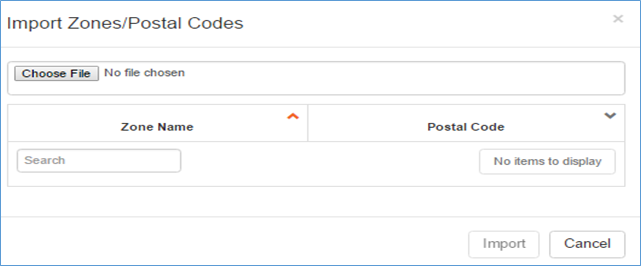
Import Zones/Postal Codes
- Click the (Choose File) button and select the file that contains your Zone and postal code association
- Import file must be in the same format as the Zone Export file that is created and must be saved as a *.csv file to properly work with the SmartWare import function
- Once an import file is selected a list of zone names and zip/postal codes will be displayed on the screen
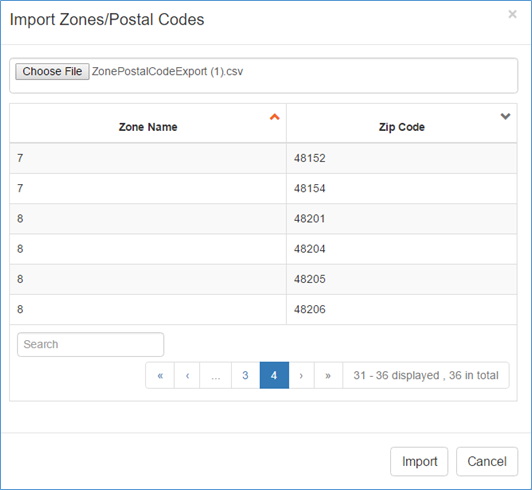
Import Zones/Postal Codes (file loaded)
- Once you have verified that all zone & zip/postal code columns appear correct, click the (Import) button
- Each zip/postal code will be associated with the zone it was associated with on the import files referenced in the import file