Overview
The following document will guide you through the necessary steps to connect SmartWare with your QuickBooks Online company file.
Navigate to QuickBooks Setup
You can access the QuickBooks Setup panel by navigating to the following location:
- From the main menu on the left side of the screen, select Accounting and then QuickBooks Setup
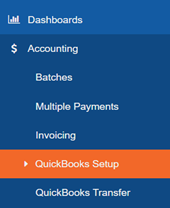
Main Menu – QuickBooks Setup
QuickBooks Setup
From the QuickBooks Setup panel, click the  (Connect to QuickBooks) button
QuickBooks Setup
An Intuit QuickBooks sign in window will open prompting you to log into QuickBooks
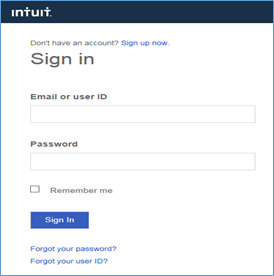
QuickBooks Online – Sign In
- Enter in your login credentials for the QuickBooks Online account you would like to link to SmartWare
- Click the
 (Sign In) button
- If you are already signed into QuickBooks Online, then the Intuit Sign In screen will be bypassed. You may need to sign out and start over if the account you are signed into is not the one you are trying to connect to SmartWare
- Depending on if your QBO login information has access to one or multiple QBO Company files will determine which screen you are brought to next
Offices with multiple QBO Company Files:
You should see a ‘You’re almost ready….’ screen appear
Under ‘Which company would you like to connect to?’ section, click on the QuickBooks company file you would like to connect to SmartWare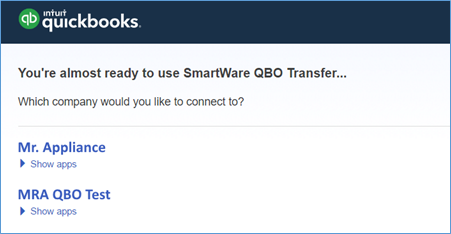
Intuit: You’re almost ready……
All Offices:
You should now see an ‘Authorizing the Sharing of Your Data….’ screen appear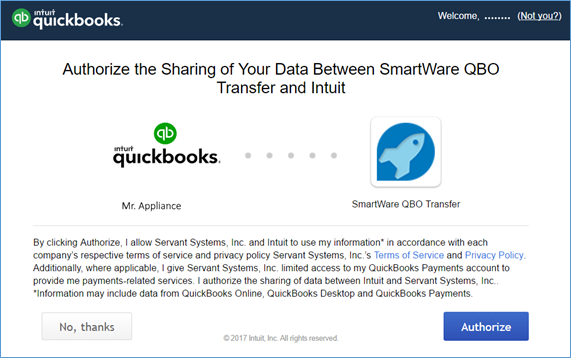
Intuit: Authorize the Sharing of Your Data….
From the ‘Authorizing the Sharing of Your Data….’ screen, verify the Intuit QuickBooks company file listed is the one you would like to connect to SmartWare and then click the  (Authorize) button
An ‘Intuit is now securely transmitting your data....’ screen will appear indicating that QuickBooks is connecting to SmartWare
Once the connection is complete, the Intuit QuickBooks popup window will close and you will notice that the QBO Token, QBO Secret, & QBO Realm ID field have been populated with information on the SmartWare QuickBooks Setup panel
Enter QuickBooks Company Name in SmartWare
From SmartWare, navigate to Setup Franchise | Setup | Options and select Territories from the Options dropdown list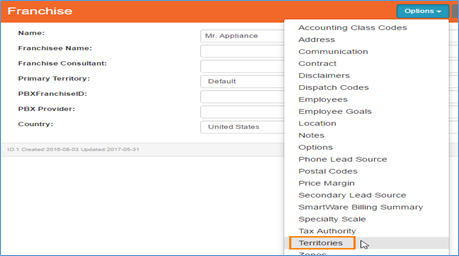
Franchise - Options
- The Territories panel will load allowing you to make changes

Territories
- From the Territories panel, click the
 (edit) button next to the territory you would like to update the QuickBooks Online credentials for
- For offices with multiple territories: You will need to connect each territory to their own QBO file
- In the QuickBooks Company Name: field, enter in the name as it appears ‘exactly’ in QuickBooks Online and then click the
 (Save) button to save your changes
Territories - edit
Verify Credentials
Navigate to Accounting | QuickBooks Setup and click  (Verify) button next to the territory name
- For offices with multiple territories: Click the
 (Verify) button next to the territory you just updated with QuickBooks information
QuickBooks Setup
- If no authentication error appears in the Error/Warning grid, you have successfully updated your QuickBooks Online credentials and are ready to begin transferring information from SmartWare to your QBO Company file
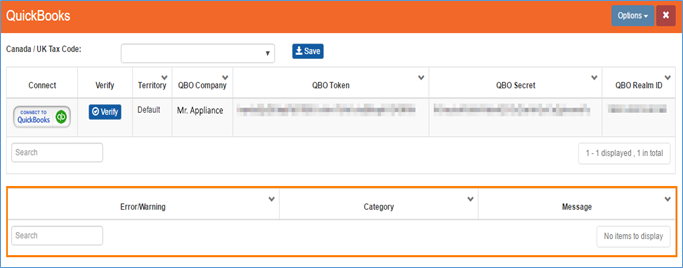
QuickBooks Setup
Canada/UK Offices Only
Canada and UK offices will need to associate a QuickBooks Tax Code with SmartWare. This will be used to specify which QuickBooks Tax Code should be defaulted on invoices received in QuickBooks from SmartWare

QuickBooks Setup
- Navigate to Accounting | QuickBooks Setup and in the ‘Canada/UK Tax Code:’ dropdown box, select the QBO Tax code you would like applied to invoices sent to QuickBooks
- Since SmartWare sends over tax information as its own line item on an invoice, a QBO Tax Code with 0% rates should be selected
- Most Canada/UK offices should have a ‘Z’ tax code in their QBO account which should be selected in the ‘Canada/UK Tax Code’ drop down box
- Once you have selected the appropriate Tax Code, click the (Save) button to save your changes
 (edit) button next to the territory you would like to update the QuickBooks Online credentials for
 (Save) button to save your changes