Overview
MPG, or Menu Pricing Guide, contains a catalog of Tasks, called a Price Book. When you want to add a Task to your Work Order, instead of having to manually enter in a price and a cost for a Task each time, you are instead pulling a Task from a Price Book with all the information already filled out and ready.
1 - Navigate to Menu Pricing Guide
(1.0) To get to the Menu Pricing Guide screen click Administrative (1) in the main menu and then select Menu Pricing Guide (2).
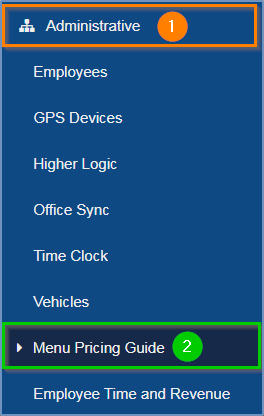
Figure 1.0
2 - Menu Pricing Guide Screen
(2.0) At the top of the Menu Pricing Guide screen is a list of criteria (1) which you can search by and view the Tasks for, and below that is a table (2) which contains all the Tasks currently assigned to the Price Book that you have selected.
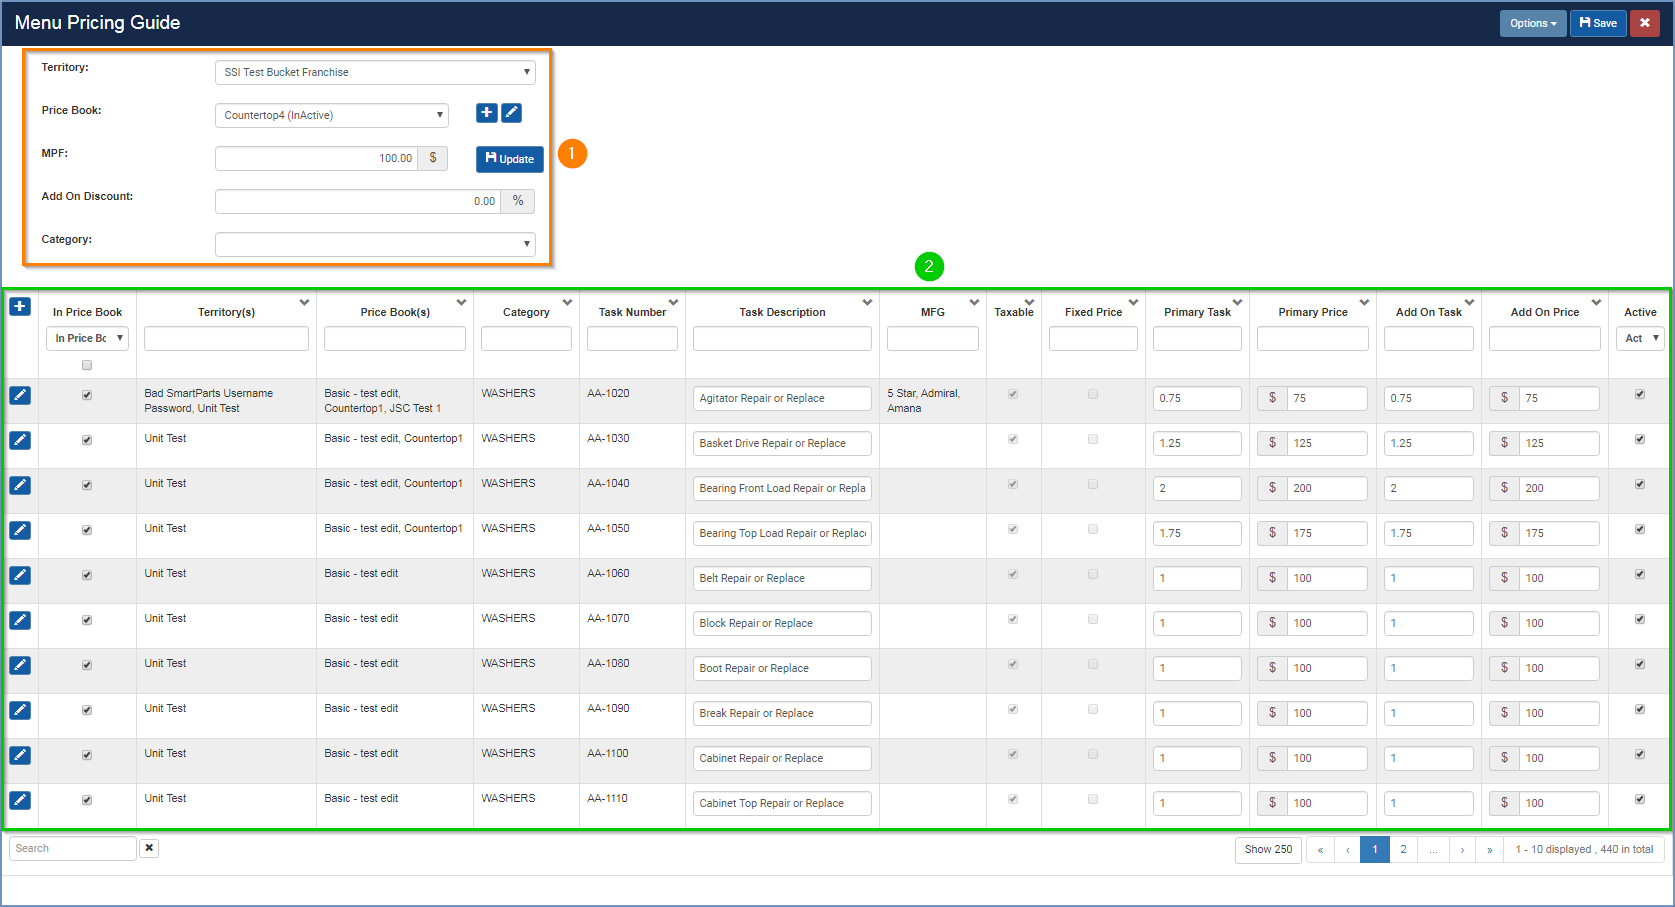
Figure 2.0
(2.1) The search criteria at the top starts with you determining which Territory in your Franchise that you wish to find a Price Book for.
(2.2) You can then select a Price Book that is associated with that Territory (2). To the right of it is a plus sign icon which you can use to create a new Price Book for the Territory or an edit icon (3) to edit the Price Book you currently have selected.
(2.3) Below that is a MPF (Menu Pricing Factor) field (4) which will display the Labor Rate (how much cost in labor is added to all the Tasks per hour) for all Tasks in all of your Price Books.
(2.4) The Add On Discount field (5) determines what the price discount is on an Add on Task versus a Primary Task for all your Price Books. For instance, a discount of 25% means that a Primary Task that is one hour long will be 0.75 hours long for an Add on Task.
(2.5) At the bottom is a Category drop down list (6) which will let you sort the Tasks in the Price Book table below the search criteria by the Category you select.
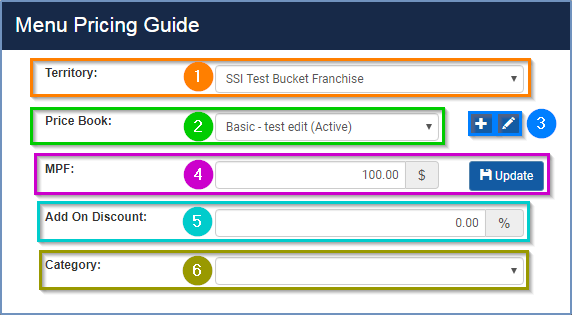
Figure 2.1
(2.6) Below that you will see a table (1) which will display all the details for each Task in your Price Book. You will also see a plus sign icon (2) which will allow you to add more Tasks to your Price Book as well as an edit icon (3) for each existing Task.
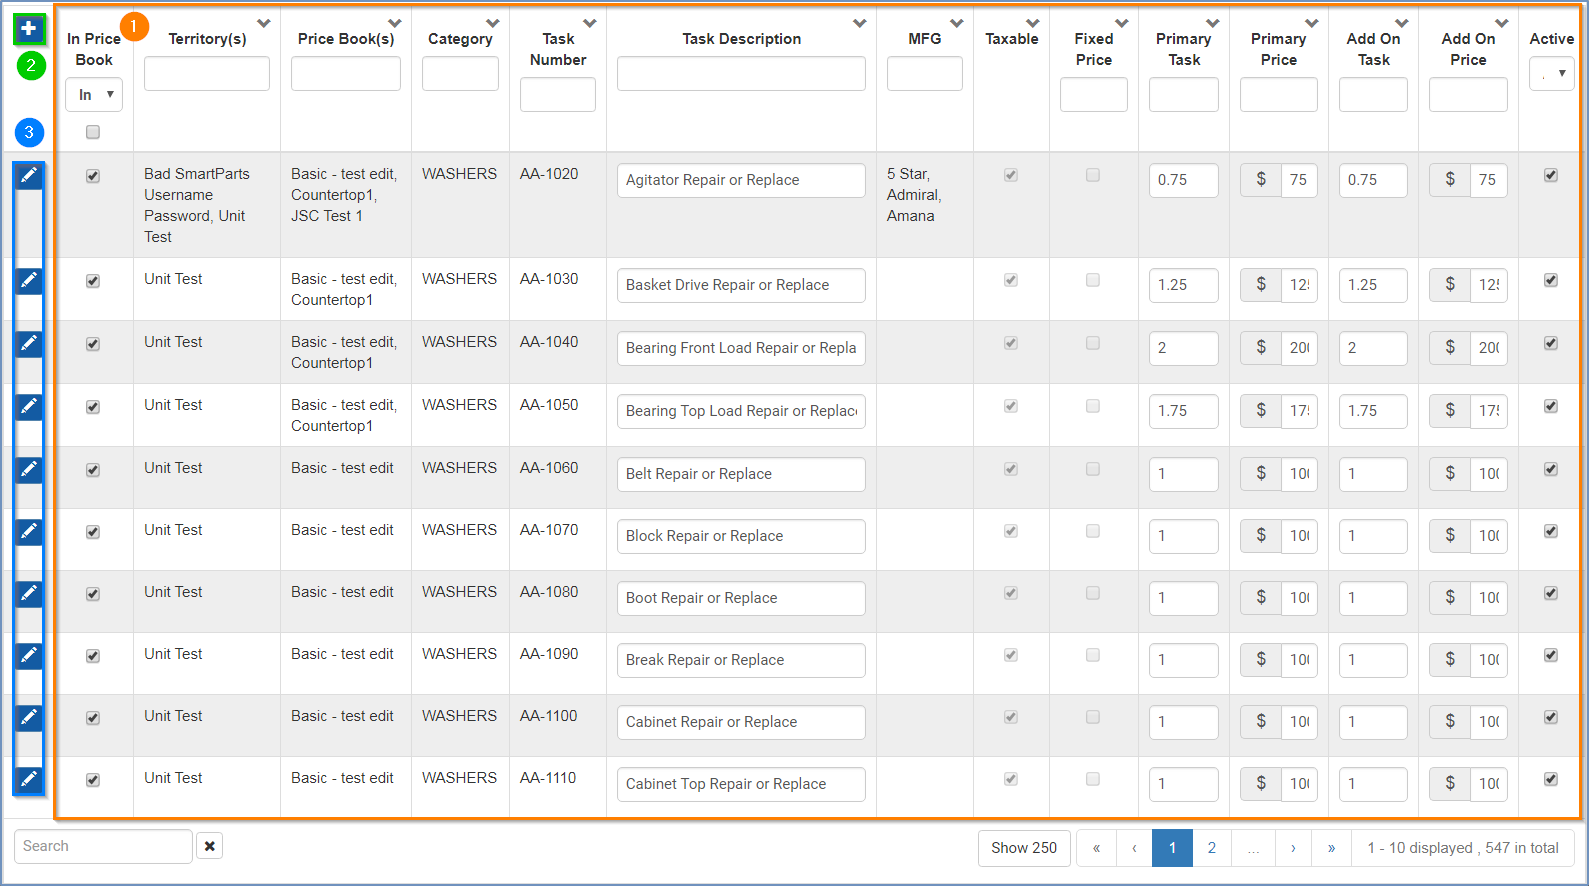
Figure 2.2
3 - Create a New Price Book
(3.0) If you press the plus sign icon next to the current Price Book you will be brought to a screen that will allow you to fill out the necessary information to create a new Price Book.
(3.1) The information you will be asked to fill out includes:
- A Name for your Price Book (1)
- Whether you want this Price Book to immediately copy all the Tasks from an existing Price Book (2) into this Price Book
- If you want this Price Book to have a specific Code or Customer Type associated with it (3)
- Any Territory, Labor Rate or Job Discount information for the Price Book (4)
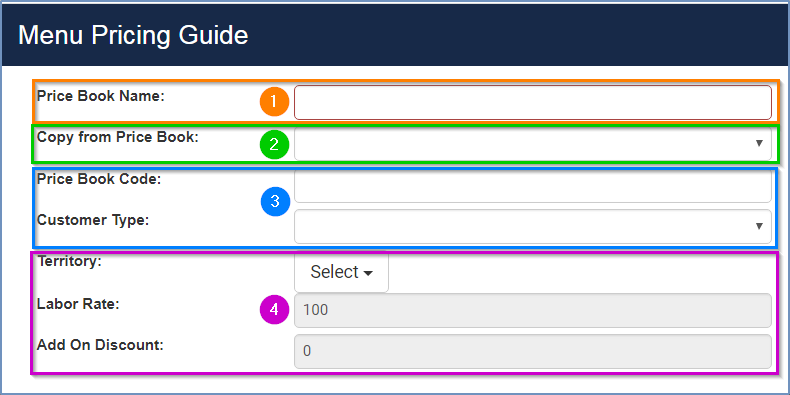
Figure 3.0
4 - Edit a Price Book
(4.0) If you press the edit icon next to the current Price Book on the Menu Pricing Guide screen you will be brought to a screen that will allow you to change the Price Book's Name, Code, Customer Type and IsActive status.
(4.1) Customer Type will determine which type of Customer will be able to have this Price Book for their Work Orders.

Figure 4.0
5 - Create, Edit or Add a Task for Your Price Book
(5.0) If you press the plus sign or edit icon for editing/adding a new Task to your Price Book you will be shown a screen to the right of the MPG panel that will provide you with different criteria (1) that you need to fill out in order for this Task to be added to your Price Book.
- Categories and Task Numbers are used when trying to find your Task to assign it your Work Order.
- QB Account means that this Task will appear, as whatever type you select, in QuickBooks.
(5.1) Below that section will be a table (2) under the Labor Value header with how many Hours the Task will be and its Price when it is the Primary Task for a Work Order. The Add On Hours and Add On Price are what the price and hours will be if this Task is a Task that was added on to a Work Order in addition to another Task.
(5.2) To add a new Labor Value to a Task, or edit an existing one, press the plus sign icon (3) or edit icon (4) respectively under the Labor Value header.
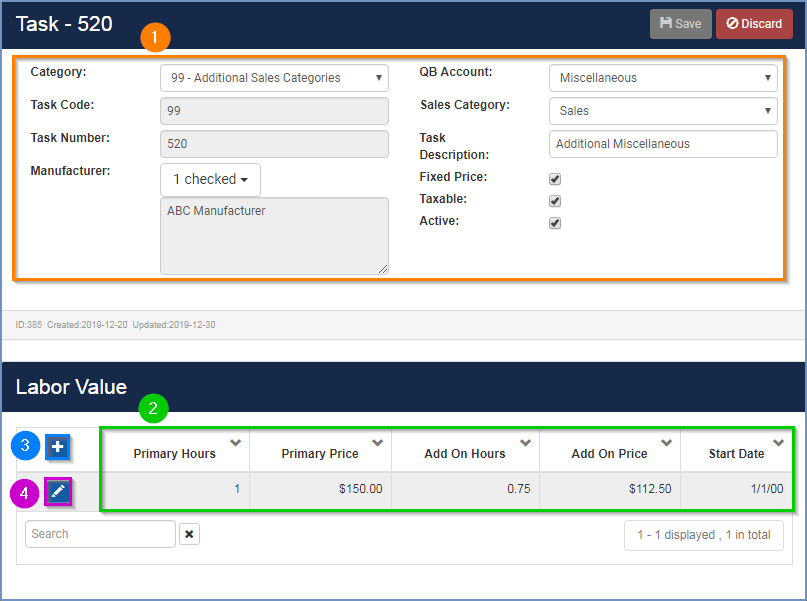
Figure 5.0
(5.3) From the new screen that pops up when you press the plus sign icon or edit icon for Labor Value you will be able to change the labor hours and/or prices and choose a date when you want this change to take effect.
(5.4) Primary Hours and Primary Prices (1) determine how much the Task will cost per hour if this is the main Task on the Work Order. Add on Hours and Add on Price (2) determine how much this Task will cost per hour if this Task is a secondary add on Task to a Work Order.

Figure 5.1
Add a Task
(5.5) You can also search a Task and add it to your currently selected Price Book. To do this, click the In Price Book dropdown (1) from the table in the main MPG screen and select Not In Price Book (2).
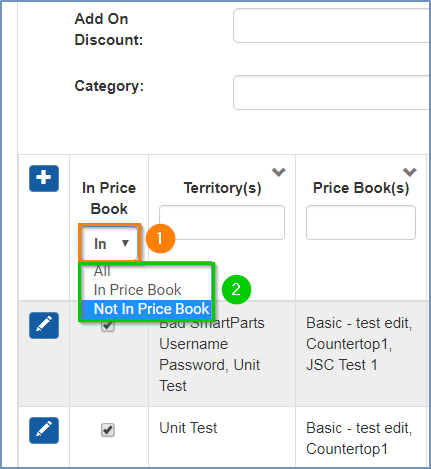
Figure 5.2
(5.6) From there you can search through the table and if you click the unchecked box (1) for one of the Tasks it will be added to your currently selected Price Book. Alternatively you can click the unchecked box at the top of the In Price Book column (2) to add all the unchecked Tasks into your Price Book. Press Save.
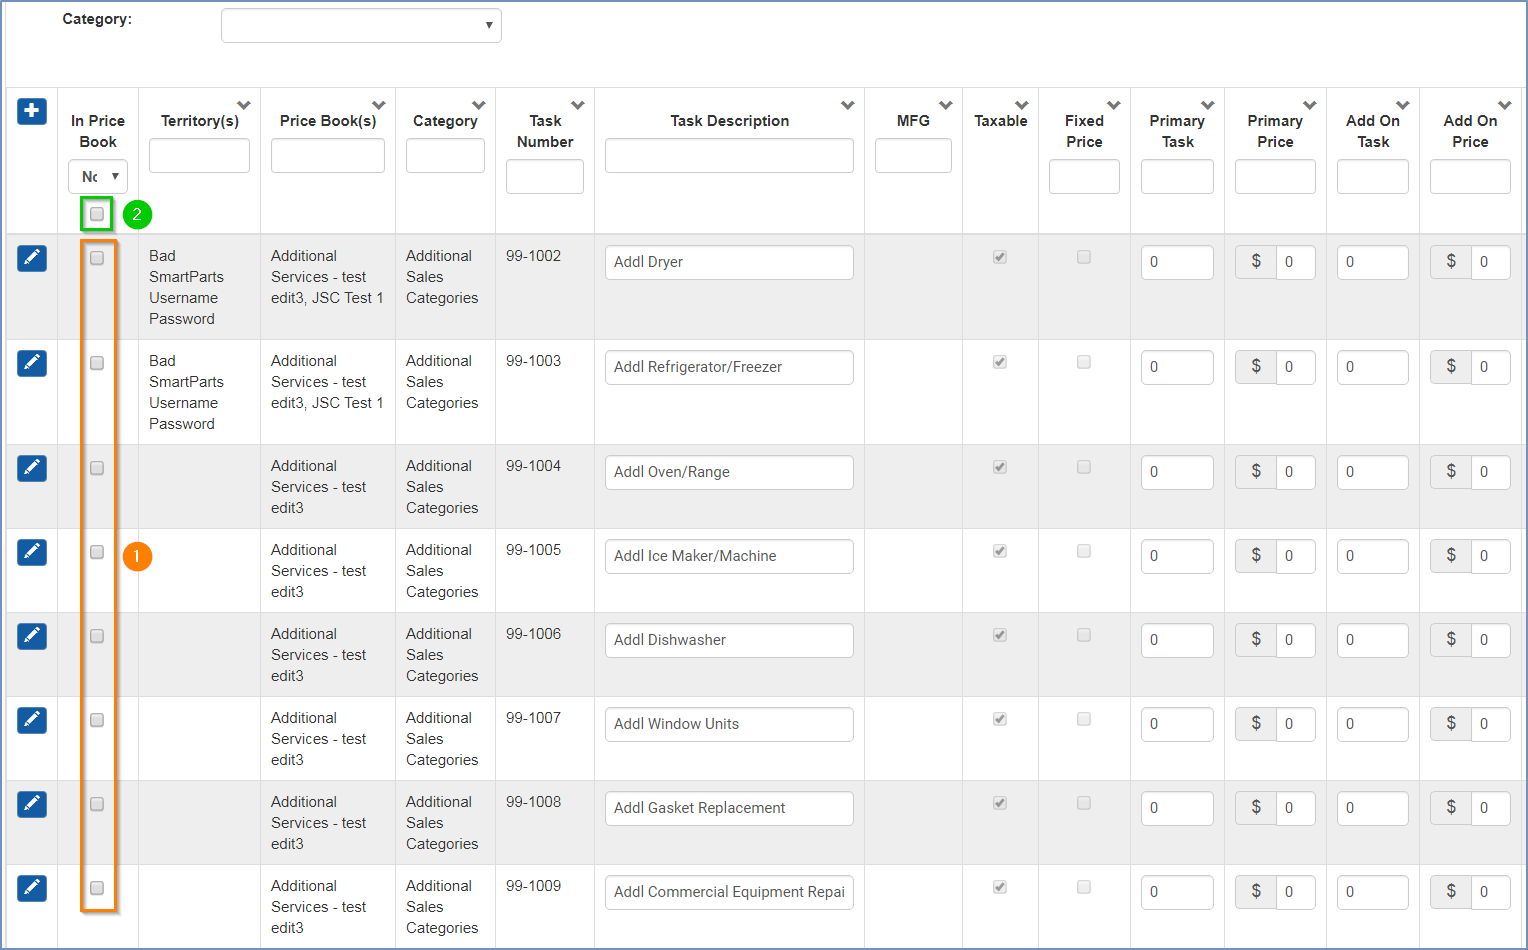
Figure 5.3
6 - Menu Pricing Guide Options Button
(6.0) At the Menu Pricing Guide screen at the top right of the main panel there is an Options drop down button (1). There are three options in this drop down list (2). The Home option will bring you back to the main MPG screen.
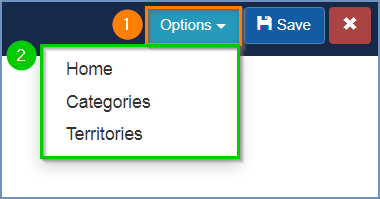
Figure 6.0
6a - Categories
(6.1) After selecting the Categories option you will find yourself at the Category Settings screen. There you will see a list (1) of all the different Categories that are available for you to assign to Tasks. To edit a Category press the edit icon (2) next to the Category you wish to edit.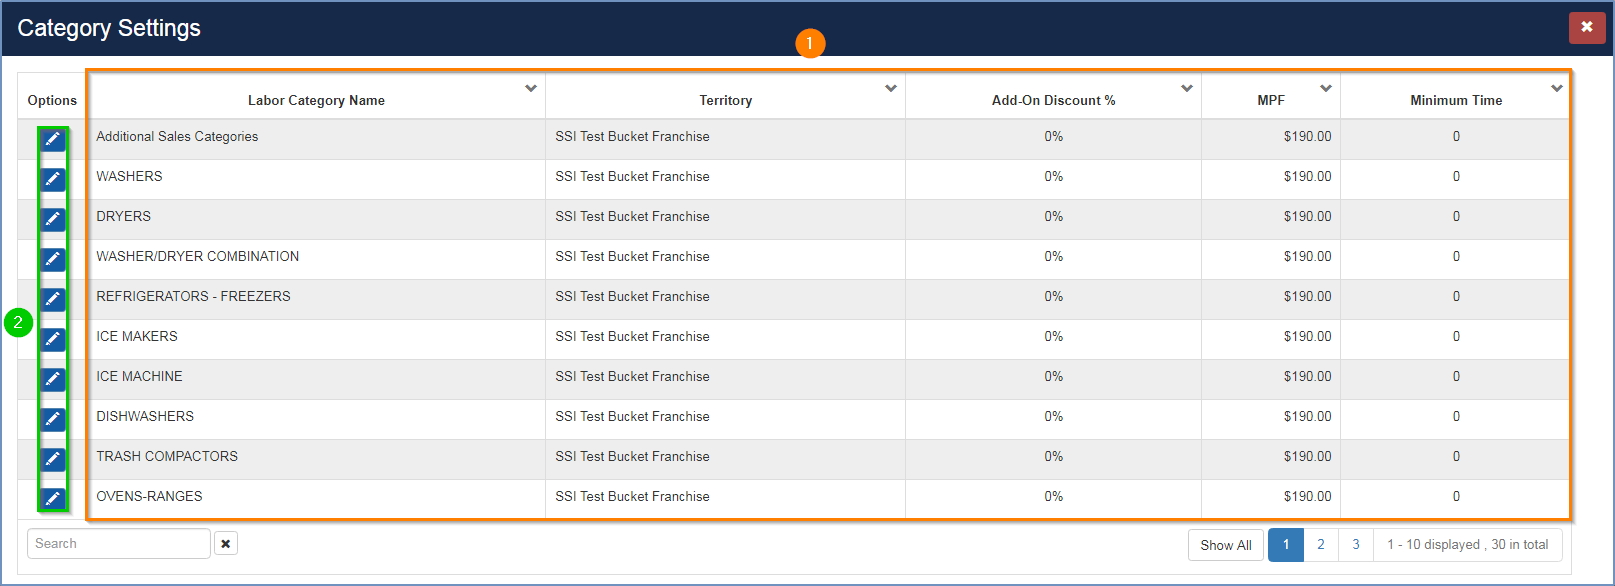
Figure 6.1
(6.2) If you press the edit icon a small box will appear to the right of the list and you will be able to change some of the information for that Category.
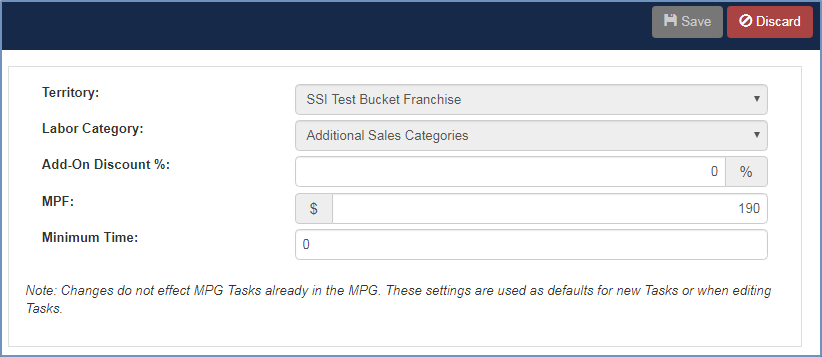
Figure 6.2
6b - Territories
(6.3) If you selected the Territories option from the drop down you will be taken to a Territories screen which will list (1) all the Price Books and Territories that exist for your Menu Pricing Guide. If you press the plus sign icon (2) or edit icon (3) you can add a new Price Book/Territory or edit an existing one.
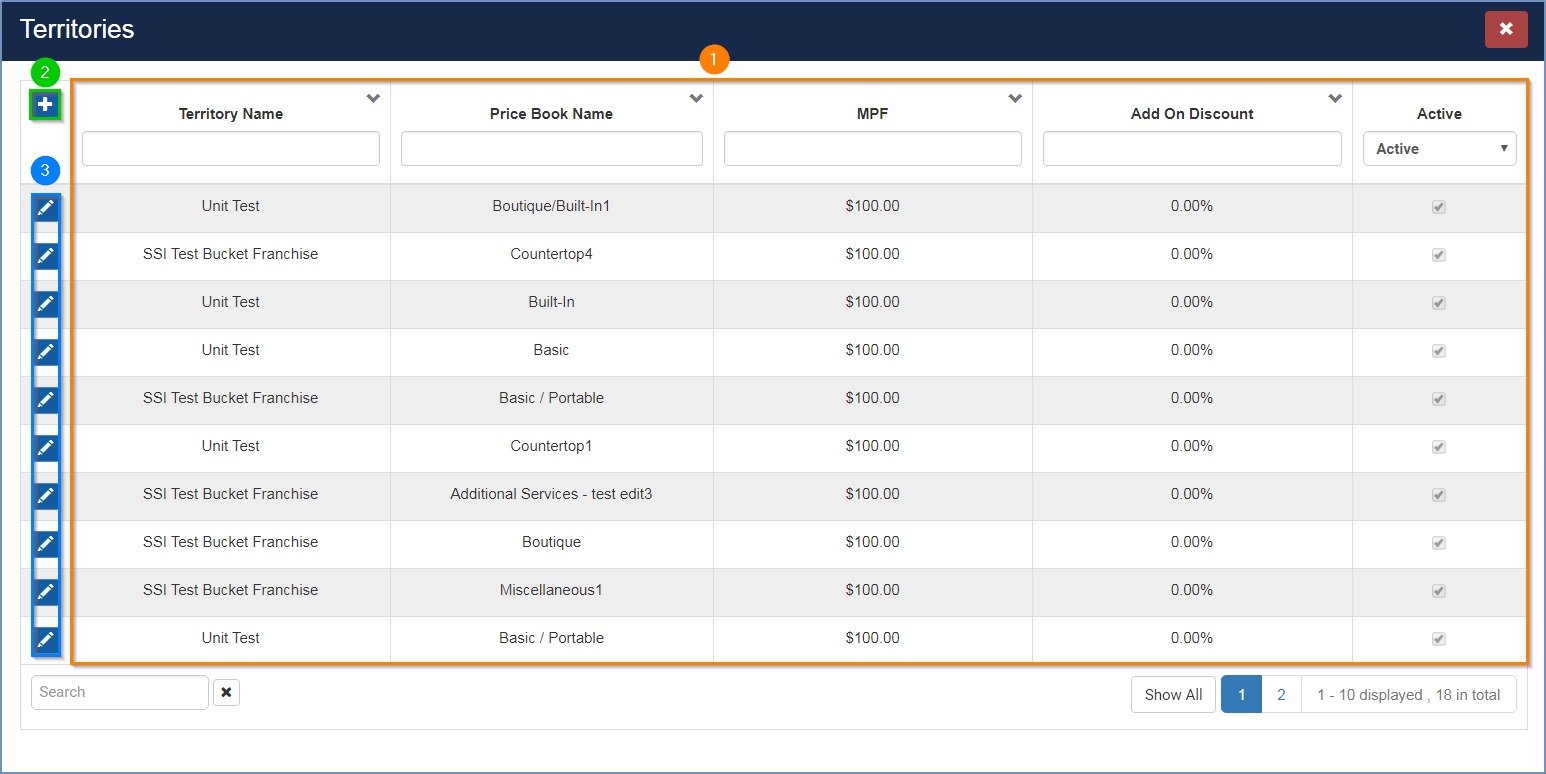
Figure 6.3
(6.4) If you press the plus sign icon you will be able to determine which Territory (1) Price Book (2) financial information and Active status (3) that you wish to assign to your new Territory / Price Book.

Figure 6.4
(6.5) If you press the edit icon the same screen will appear but you will be unable to change the Territory or Price Book.

Figure 6.5
7 - Setting a Default Price Book for a Territory
(7.0) Setting a Default Price Book for a Territory is a helpful way to automatically apply a certain Price Book to a Territory without having to manually select it every time.
(7.1) To get to Territories, click Setup Franchise (1) in the main menu and then select Setup (2).
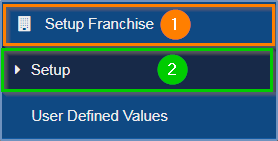
Figure 7.0
(7.2) From the Options button (1) select Territories (2).
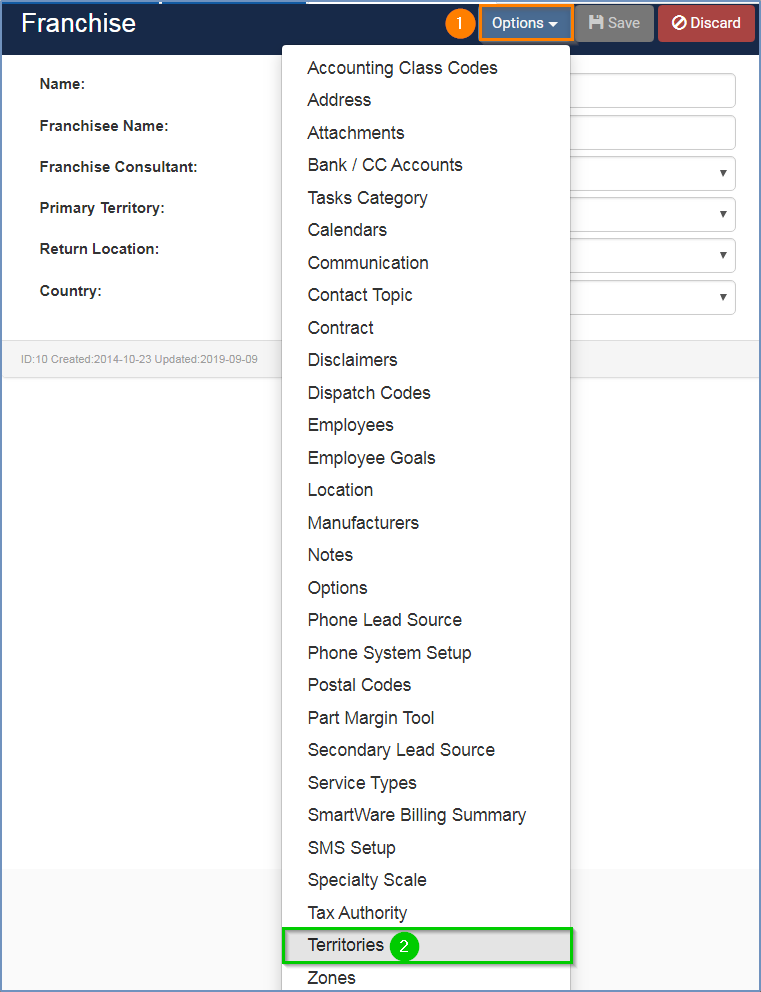
Figure 7.1
(7.3) Press the edit icon (1) next to the Territory you wish to apply a Default Price Book to.
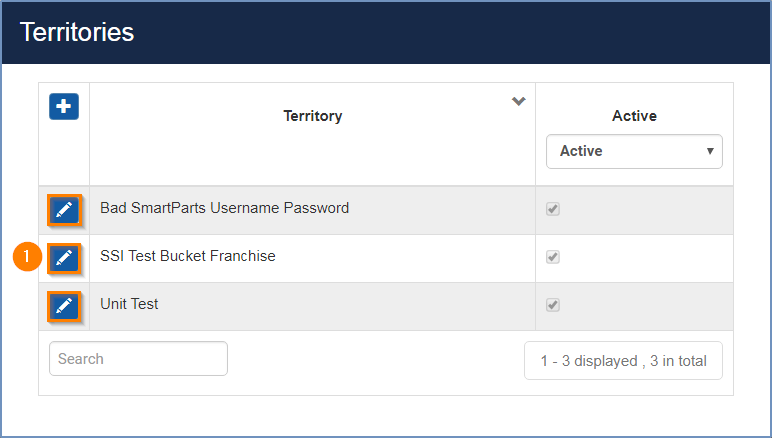
Figure 7.2
(7.4) Click the Default Price Book dropdown (1) and then select the Price Book you wish to assign to the Territory from the list (2) and press Save.
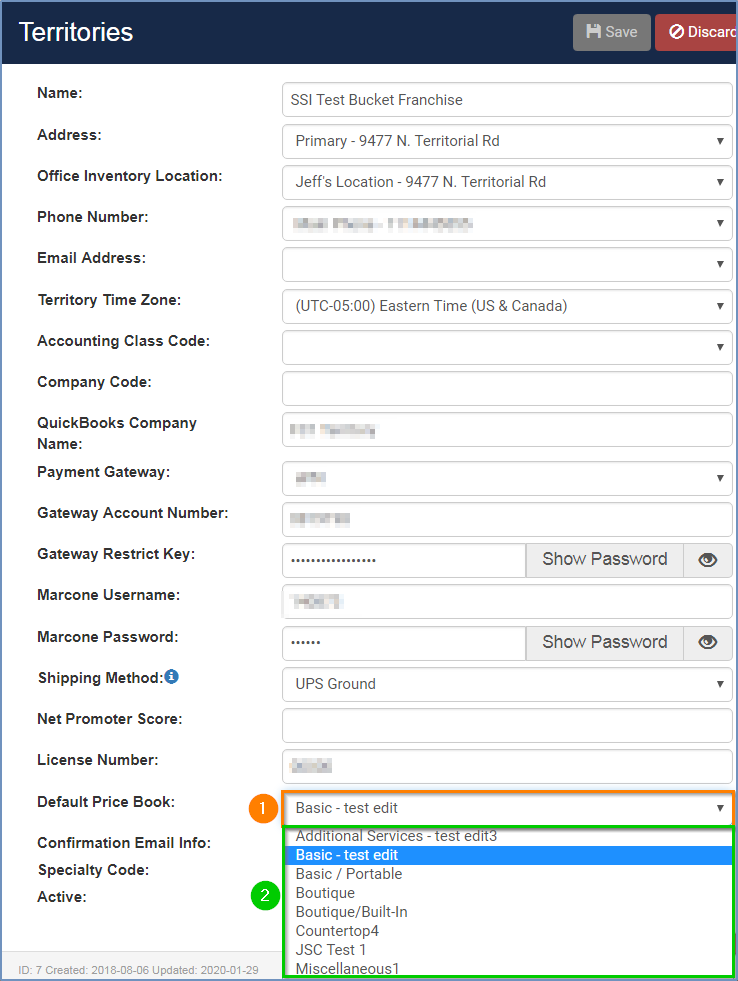
Figure 7.3