Overview
The Multiple Payments feature allows for the taking of a single customer payment and applying portions of the payment across multiple items for a single customer. For example, a customer can make one large payment that covers three different invoices.
1 - Navigate to Multiple Payments Screen
(1.0) To navigate to the Multiple Payments screen, press Accounting (1) in the main menu and then select Multiple Payments (2).
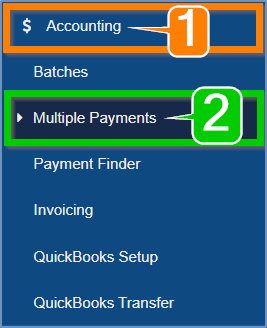
Figure 1.0
2 - Multiple Payments Screen
(2.0) Using the search, under Customer Name (1) type in and find the customer you wish to make payments for. All the work orders for the selected customer that have a balance will appear below.
(2.1) Next to each invoice for that customer is an edit icon (2) which will open the respective Work Order associated with that balance. At the other end is a plus sign icon (3) which will take that balance and move it to the next table, signifying you wish to log that as one of the multiple payments being made.
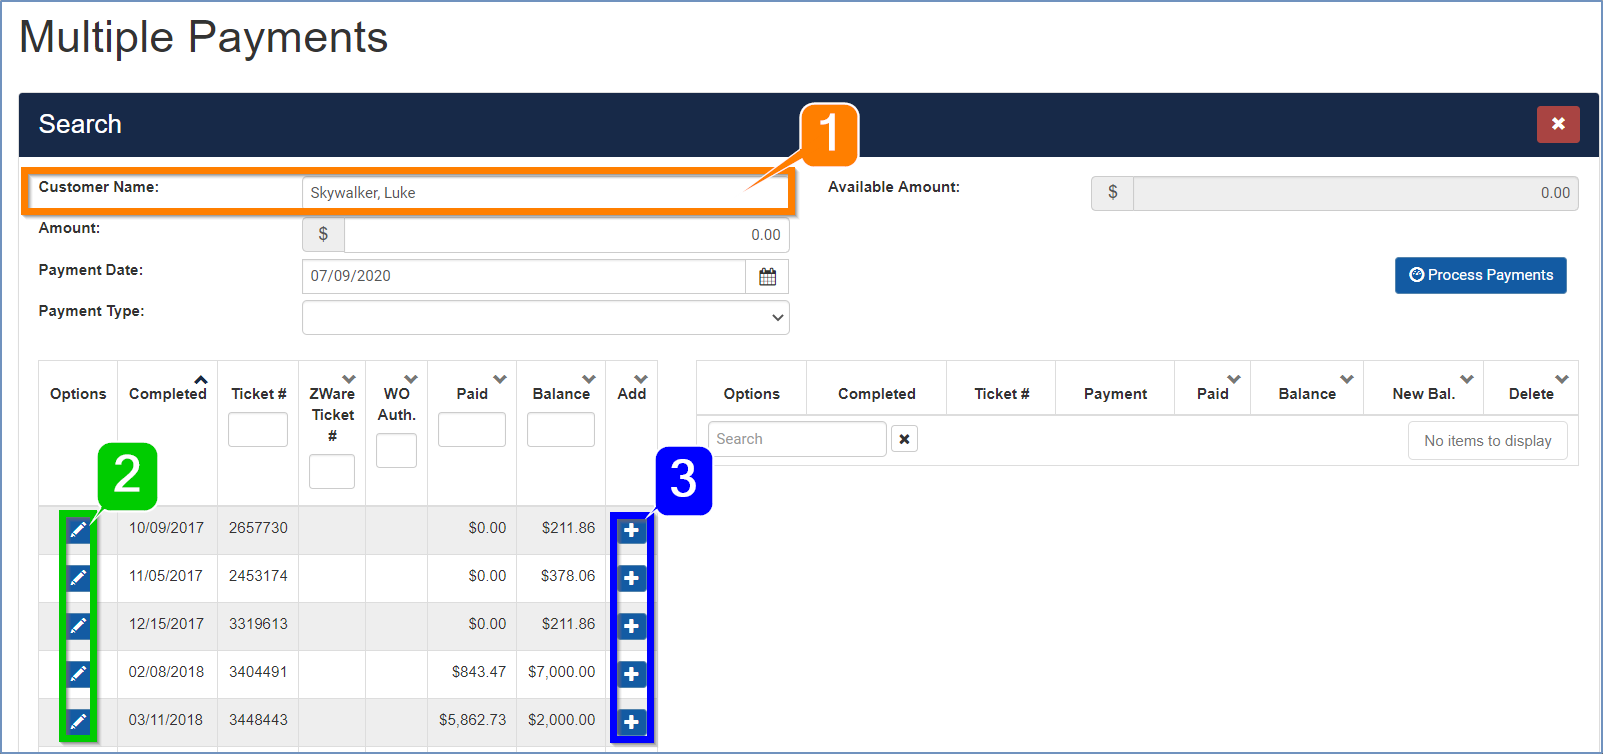
Figure 2.0
(2.2) The search will require the Customer's Name (1) and the total Amount (2) of the payment the customer is making.
(2.3) Below that will be the Date (3) the customer made the Payment and the Type of Payment (4) it was.

Figure 2.1
(2.4) If the Payment Type was Check then you will need to make sure to enter the Amount (1) of the Check the customer paid, and then specify what the Check Number was (2).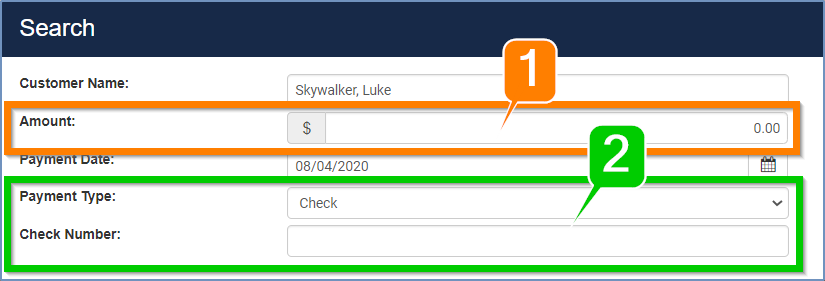
Figure 2.2
(2.5) For a credit card payment, fill out all the information as above and then select the appropriate credit card from the Payment Type dropdown and then fill out the customer's credit card information (1).
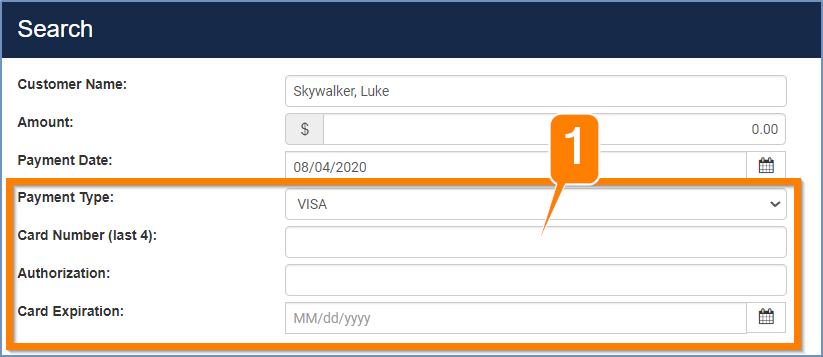
Figure 2.3
(2.6) Once you have selected the invoices you wish to make a cumulative payment for (by pressing the plus sign next to each one) you are ready for the next step.
(2.7) For the Amount field (1) enter in the total amount that the customer is paying for the multiple invoices. The Available Amount (2) will reflect this Amount minus the total payment amount currently assigned to the invoices.
(2.8) Select the appropriate Payment Date (3) for this customer's payment and from the dropdown choose what Payment Type (4) this is.
(2.9) For each invoice you added to the list of multiple payments enter in a payment amount (5). The end total of all these payments together will need to make the Available Amount (2) equal exactly zero.
(2.10) To remove a payment from the list of multiple payments, press the minus sign icon delete button (6) to remove it.
(2.11) When the Available Amount equals exactly zero you can press the Process Payments button (7) to finalize the payments. If the Available Amount doesn't exactly equal zero and exceeds or falls short of that amount you will not be able to process the payment.
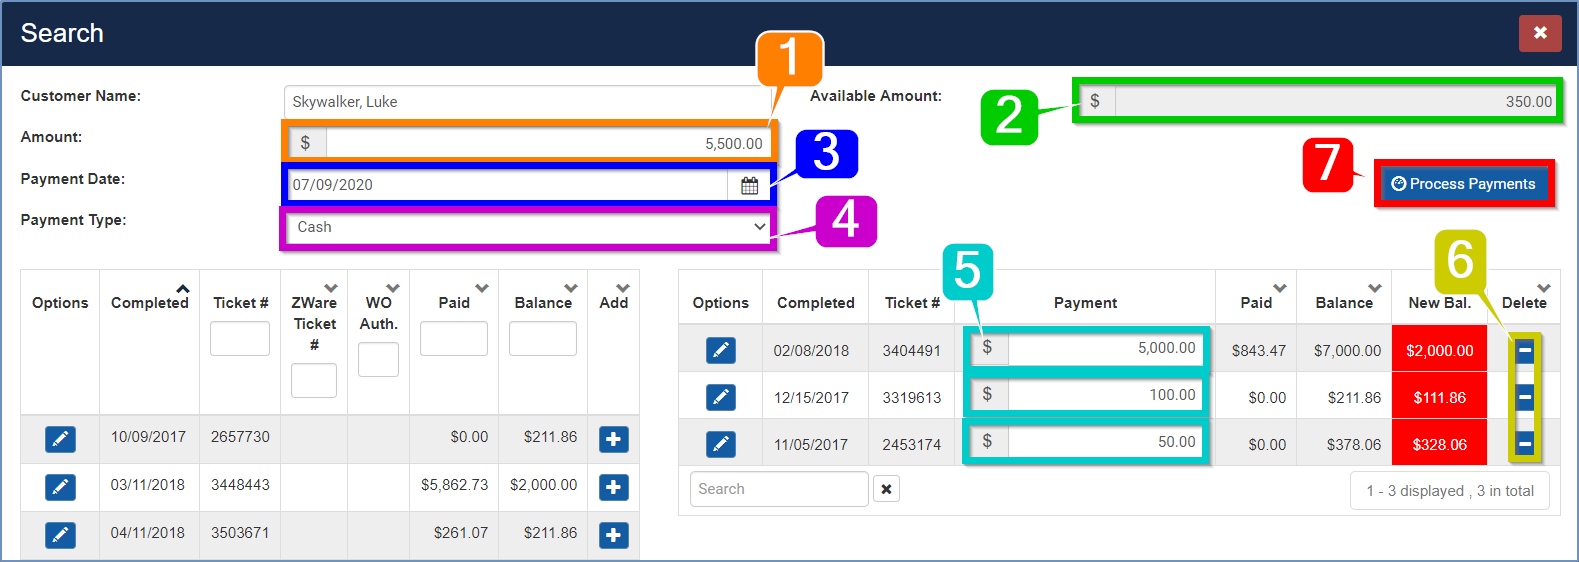
Figure 2.4
(2.12) Once the payments have been processed the Paid column (1) under the customer's payments and balances will reflect the new payment total for that invoice. The payments will also be logged with each Work Order the invoices are associated with.
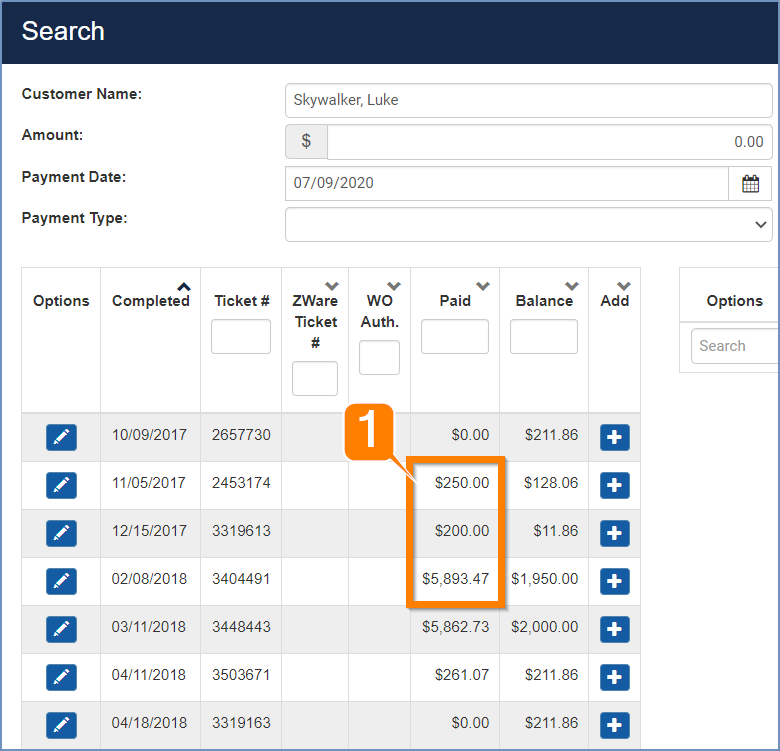
Figure 2.5